In January 2021, I travelled to Christchurch to visit friends. My idea was to travel up the East Coast then take a trip through middle earth, Christchurch to Greymouth over Arthurs Pass. Then home via the West Coast.
Canterbury is usually hot and dry and this year was no exception. The first morning I woke up to the most incredible sky. The clouds hung low in the hot still air but moved quickly across the sky, I made a post about it North Westerly Cloud Formation
North West Change
Before setting off to the West Coast I had a small culvert to fix up. The culvert needed a footing put in but I didn’t video that part of the build. I time lapsed the the rest of the build and decide to add it to the video I made.
This first video covers the stone culvert build and then the journey over Arthurs Pass to Greymouth then onto Punakaiki. I wanted to capture the blowholes in action and high tide was just on dusk. It was dark by the time I got finished up with the blowholes and the camping ground was closed. I drove North until a large tree appeared on the skyline, this was where I parked up for a few hours.
Twisted Tree
The next morning was foggy but as I drove back toward Greymouth the fog started lifting and I was treated to a stunning West Coast day.
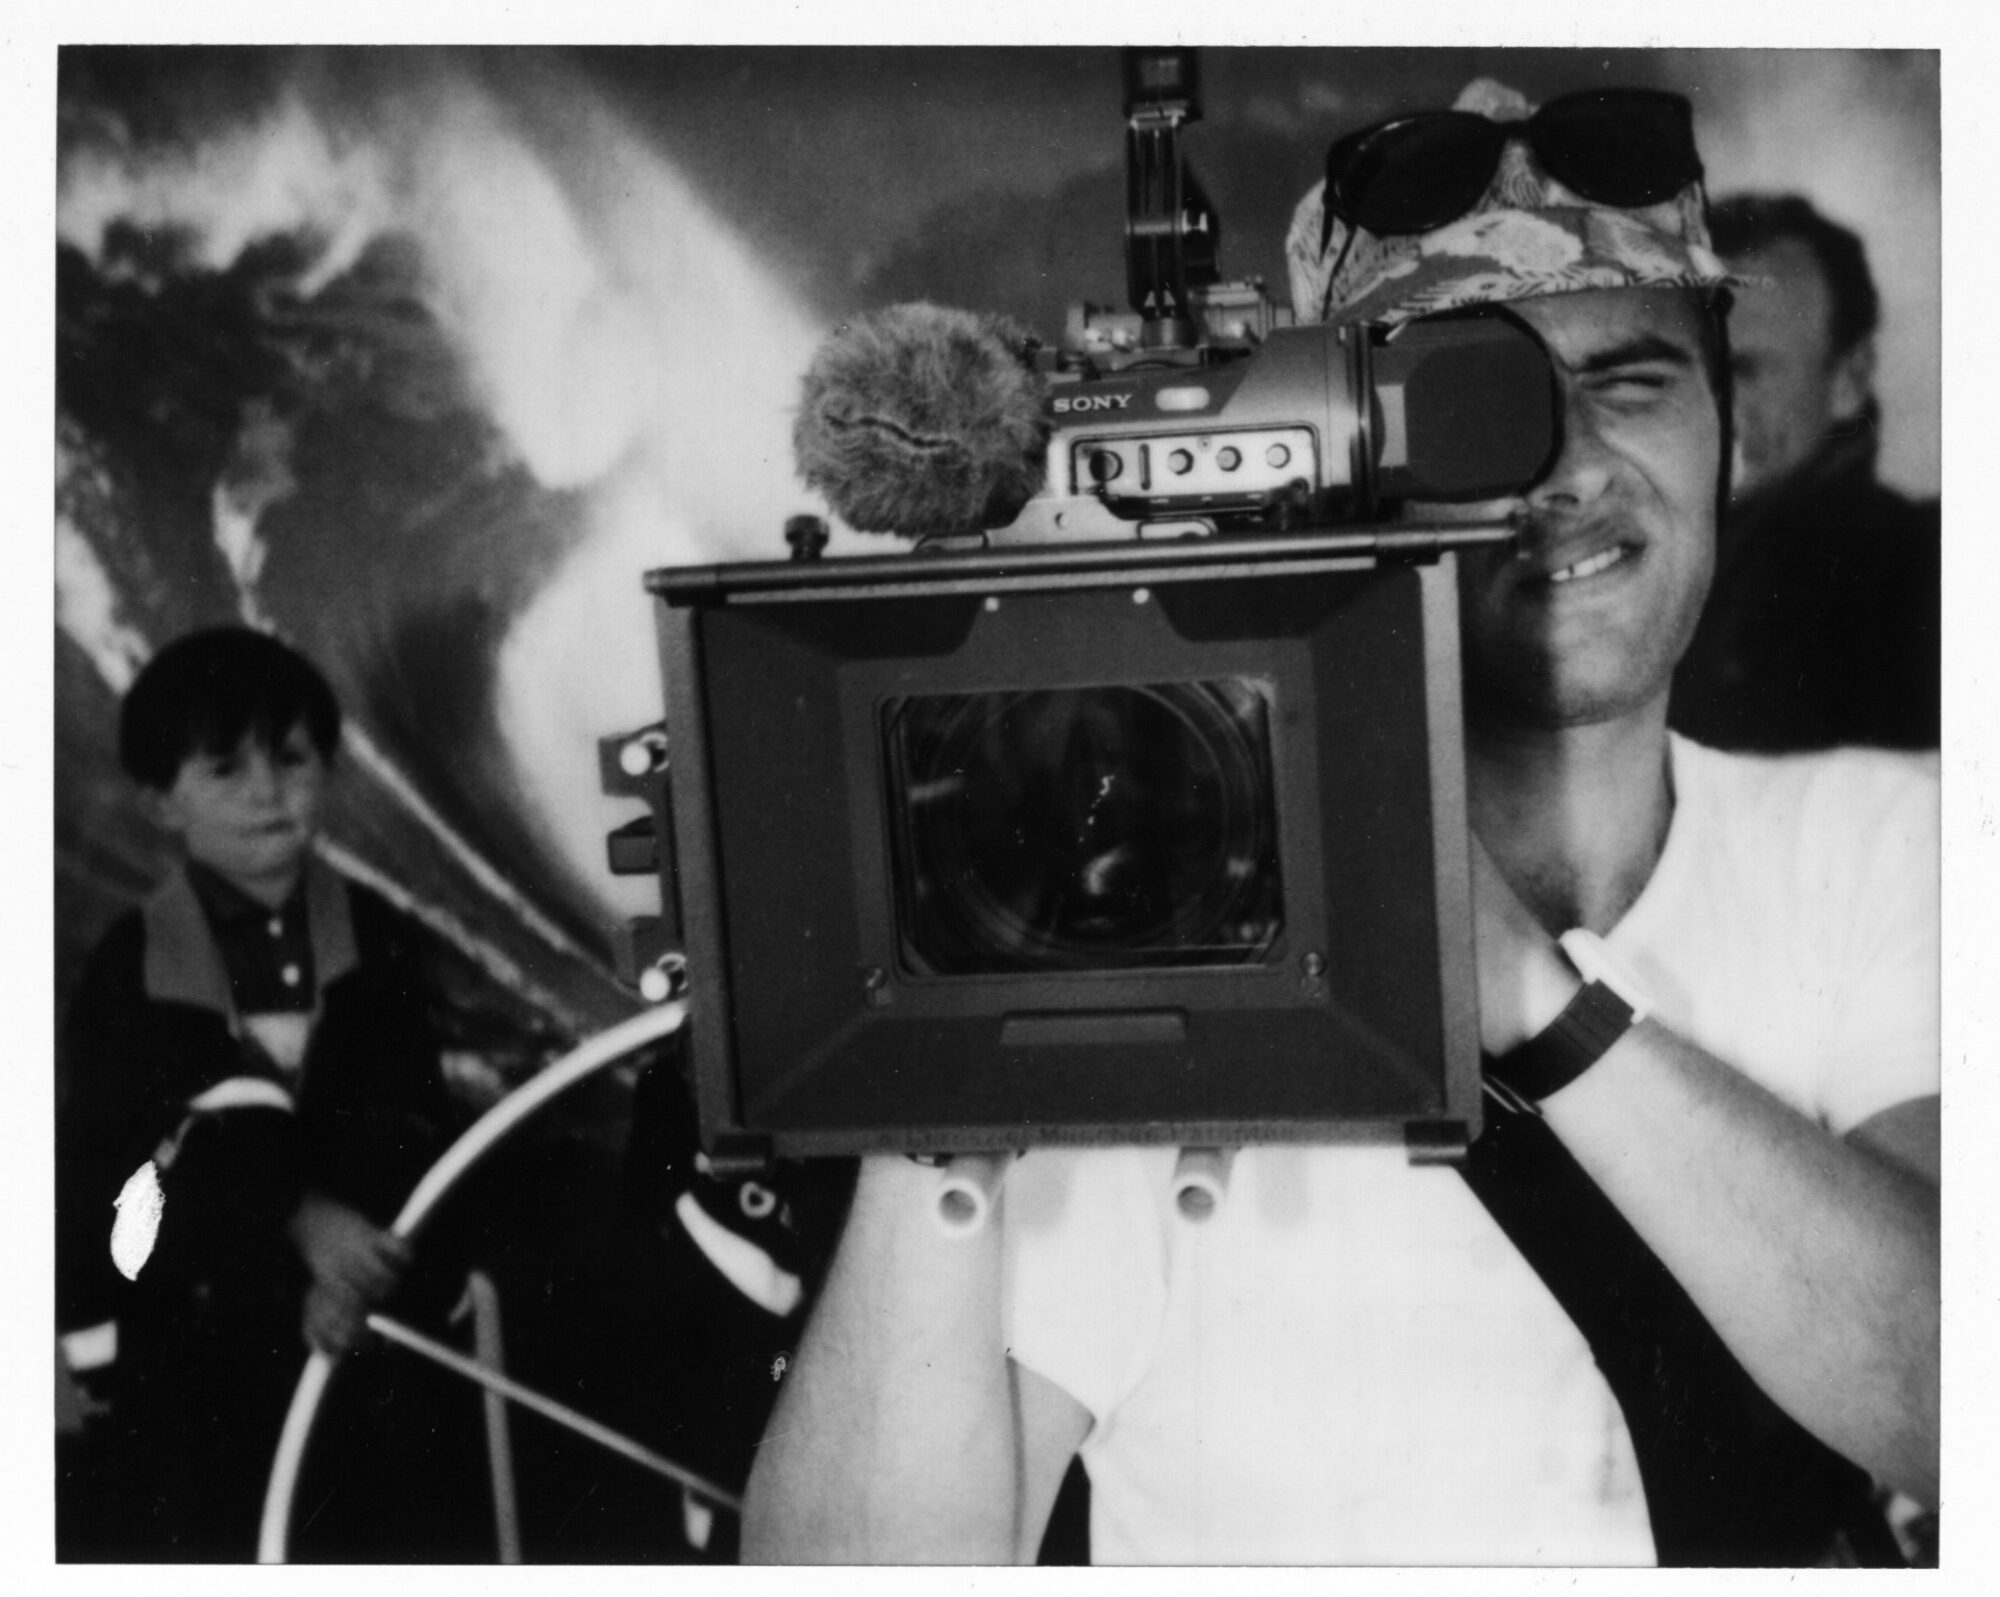
I recently installed GoPro mounts on the side windows of the van as well as the mount on the dash. It worked a treat and I was able to capture some absolutely breathtaking landscapes as I drove.
So grab a coffee, sit back and enjoy the trip through middle earth 🙂
I post a lot of my photos on Flickr so shoot over there and check them out 🙂
I stayed in the van beside a river, I was going to video the Santa Parade in Gore that day. As usual I was up and away early and was driving towards Gore. I came around the corner in Mandeville and saw a steam locomotive warming up on the side of the road. I had to stop and check out this magnificent machine, the Rogers K92 Locomotive which ran the Gore to Kingston run or the Kingston Flyer
In June 1927 the Rogers K92 Locomotive, was dumped into the Oreti River at Mararoa Junction, just above Lumsden. It was put there to help stop erosion. In 1985 the K92 was pulled out of the Oreti River and fully restored.
Rogers K92 Locomotive is now at the Waimea Plains Railway in Mandeville. When I arrived they were getting the locomotive ready for a public day, so I hung around to see it running. While waiting, I checked out the Crydon Aviation Heritage Centre next door. What a treat, not only did I happen on a Steam Locomotive but I also found myself in a hanger full of heritage aircraft.
So if you are ever passing through this way make sure you set aside a bit of time to explore Mandeville.
On a recent trip to Rangiora in North Canterbury, I woke up to a intense cloud formation overhead. The spectacle was brought about by an approaching , very hot, dry north westerly wind.
North Westerly Cloud Formation
I grabbed my GoPro and set it up to time-lapse the scene, you can just see it in the photo above. I then took the 5 photo stitch panorama above with my 5D. After shooting the first image, I went to a pond in the next paddock to get a bit of foreground interest. This image is also a 5 image panorama.
North Westerly Cloud Formation with pond
I took a couple of time lapses of this very beautiful event.
The cloud formation was surreal and the North Westerly itself, was brutal.
Dylan is tasked with shooting a hogget for diner. Dan is not impressed with Dylan’s choice and decides to shoot his own. Dan, Dylan, a penguin and a couple of seal pups enjoy a Ruapuke Sunset.
I was staying with Joel and Kylie, shooting a story about Archery, Photography and Moonshine when Kylie mentioned how her parents celebrate Christmas. I decided I needed to make a Christmas special.
Mokoreta Christmas Barn
The Gore Santa Parade was on the next day so I went along to that, then met up with Joel and Kylie and travelled to Mokoreta to meet Kylie’s parents.
Part two, of Dan’s Story. After setting up an enclosure for the hives, Dan goes back to Bluff for more hives and Dylan. Dan also brings new queens and splits the hives. The bees are loving it…
Dan Tarrant is a bee keeper in Bluff and his dream is to have bees on Ruapuke Island. Ruapuke island is a small island situated off the southern coast of the South Island of New Zealand.
The island is exposed to extraordinarily harsh conditions, so Dan and his bees have their work cut out for them.
Ruapuke Island
I’ve always wanted to visit Ruapuke so when Dan suggested I go over with him, I jumped at the opportunity. I feel honoured to have visited such an amazing place and to archive the beginnings of Dan’s journey.
Dusk Ruapuke Island
Getting the hives set up close to the flowering Manuka and protecting them from the feral cattle, is just the beginning.
This video is day one of an incredible 4 day trip and the beginning of life changing journey for Dan and his family.
I wish Dan and his family the best of luck with this venture, I believe the honey will be extraordinary just like the island itself.
This was a very impromptu trip. I started out visiting Booboo at his whitebait stand on the Mataura River then onto Tapanui via Fortrose.
I had a shot in mind on the Pomahaka River but events took a turn. I got to see a phenomenon called the Blue Mountain Express and caught up with my Uncle in Tapanui.
I visit Eamon in Gore then visit Joel to taste test some moonshine.
Photographically the trip was a bust but I did catch up with friends and Family and I captured some awesome hyper lapse footage of our beautiful countryside.
I’ve known Kip for while now and I love his music. I asked him if he would let me record him as I wanted music for my videos. He generously agreed. We managed to organise a day and time. I had set up to record Kip when the Ramblin Rosies, Kylie and Renee, came over. I improvised as much as I could to document the interactions and make this video.
So make a cuppa tea and settle into a slice of life and history with Kip and Two Rosies
Kip Tipuna smiles his way through bad times and good with a sincerity not commonly seen anymore. His generosity is humbling but what he gives when performing is genuine and powerful. In my book Kip is a legend and deserves good things…
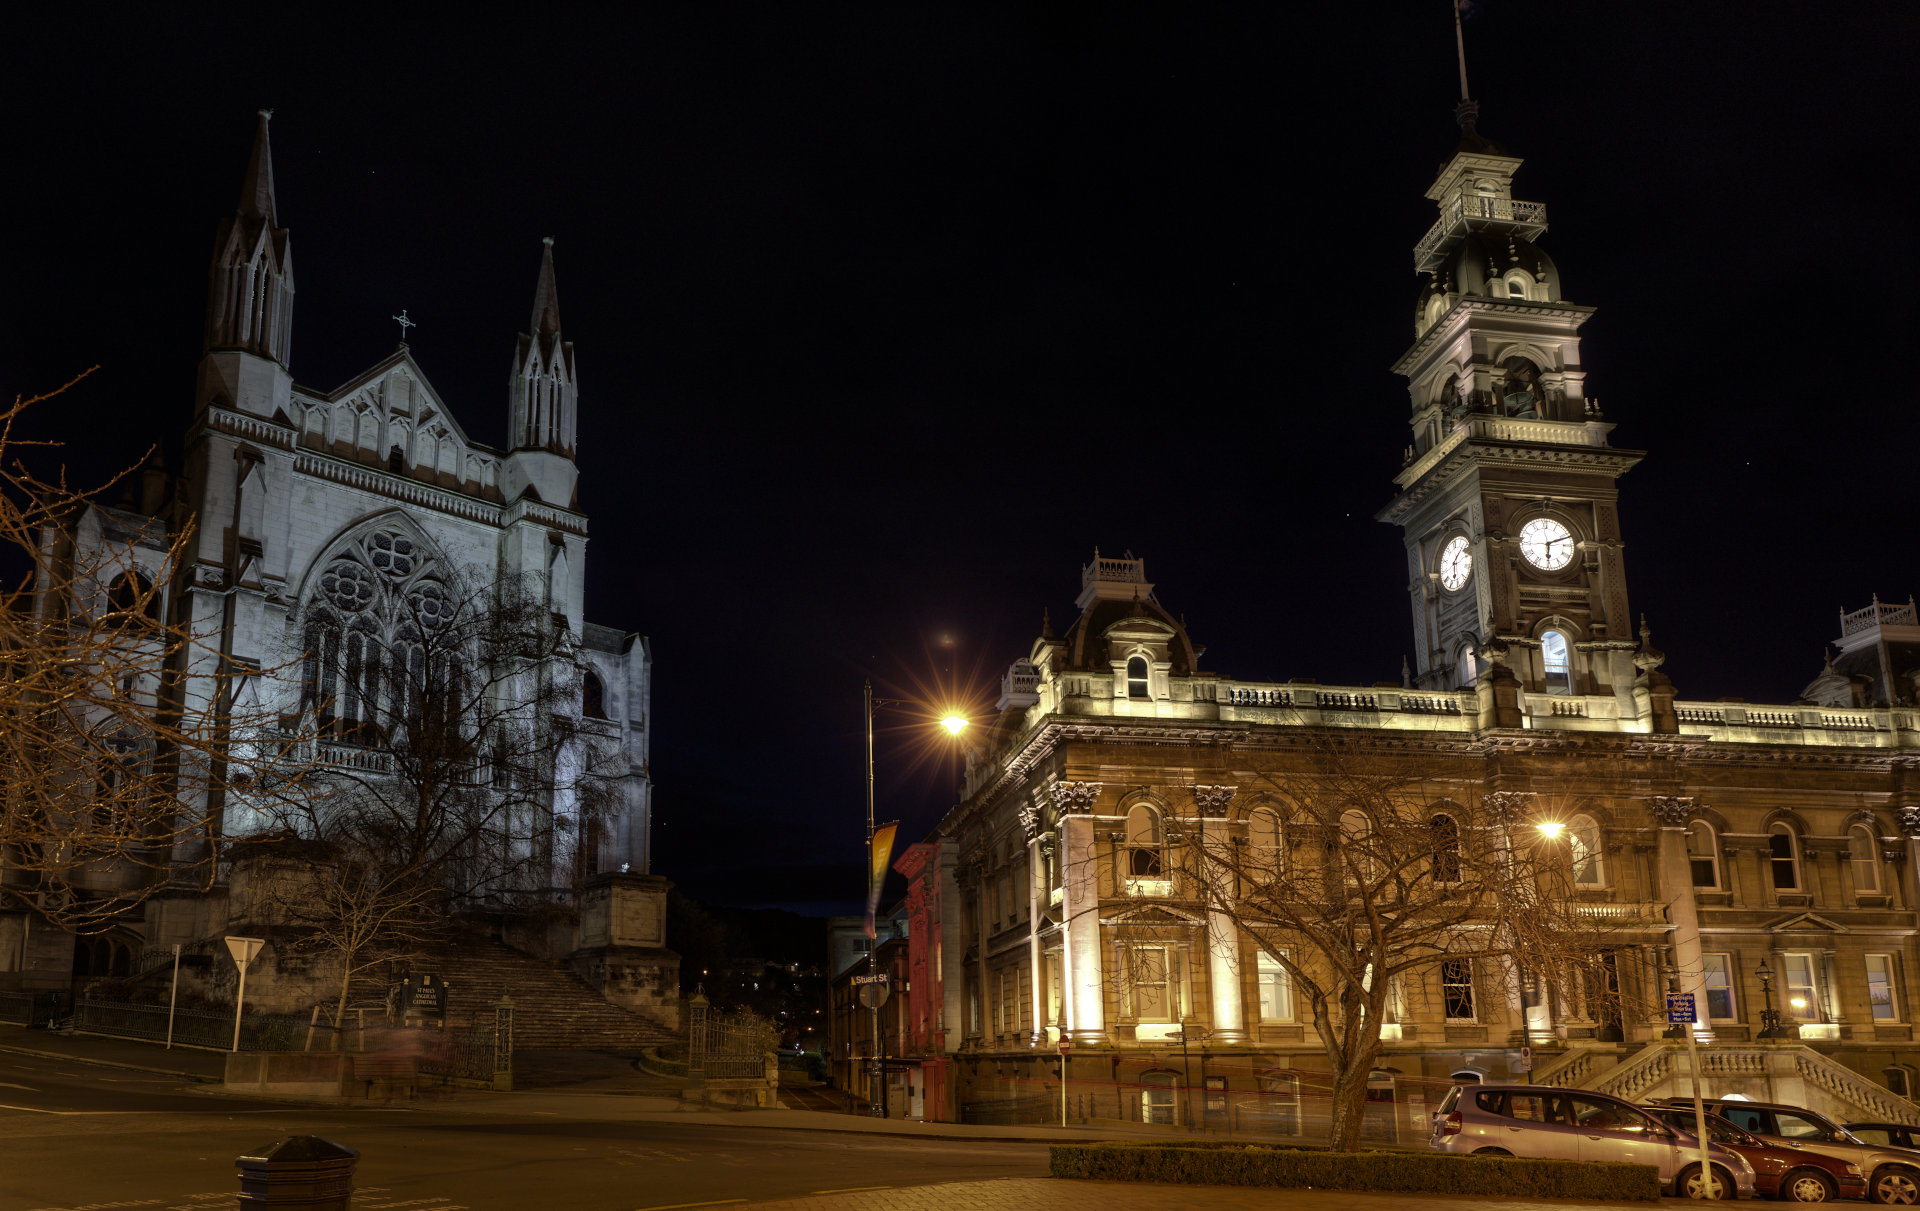
I recently had the opportunity to spend a very pleasant hour, or so, in the heart of Dunedin City. A chance to try my hand at night photography in a city Dunedin is a small city in the South East of the South Island, New Zealand. The inner city radiates out from the Octagon, the town square on steroids and the Dunedin Municipal Chambers and St. Paul’s Anglican Cathedral occupy two facets of the Octagon.
The Dunedin Municipal Chambers and St. Paul’s Anglican Cathedral – 5 shot HDR
Camera Settings
Canon 5D mk4 – Canon EF 24~70mm 2.8 USM Half second exposure – ISO200 – f8 to f3.2 I used the bracketing feature of the Canon 5D mk4 to get 5 exposures and I batch edited the RAW images in Darktable , Luminance HDR to blend the sequence and Gimp to finish. I don’t shoot a lot of High Dynamic Range HDR but I like the variety of looks you can get with HDR especially with night photography.
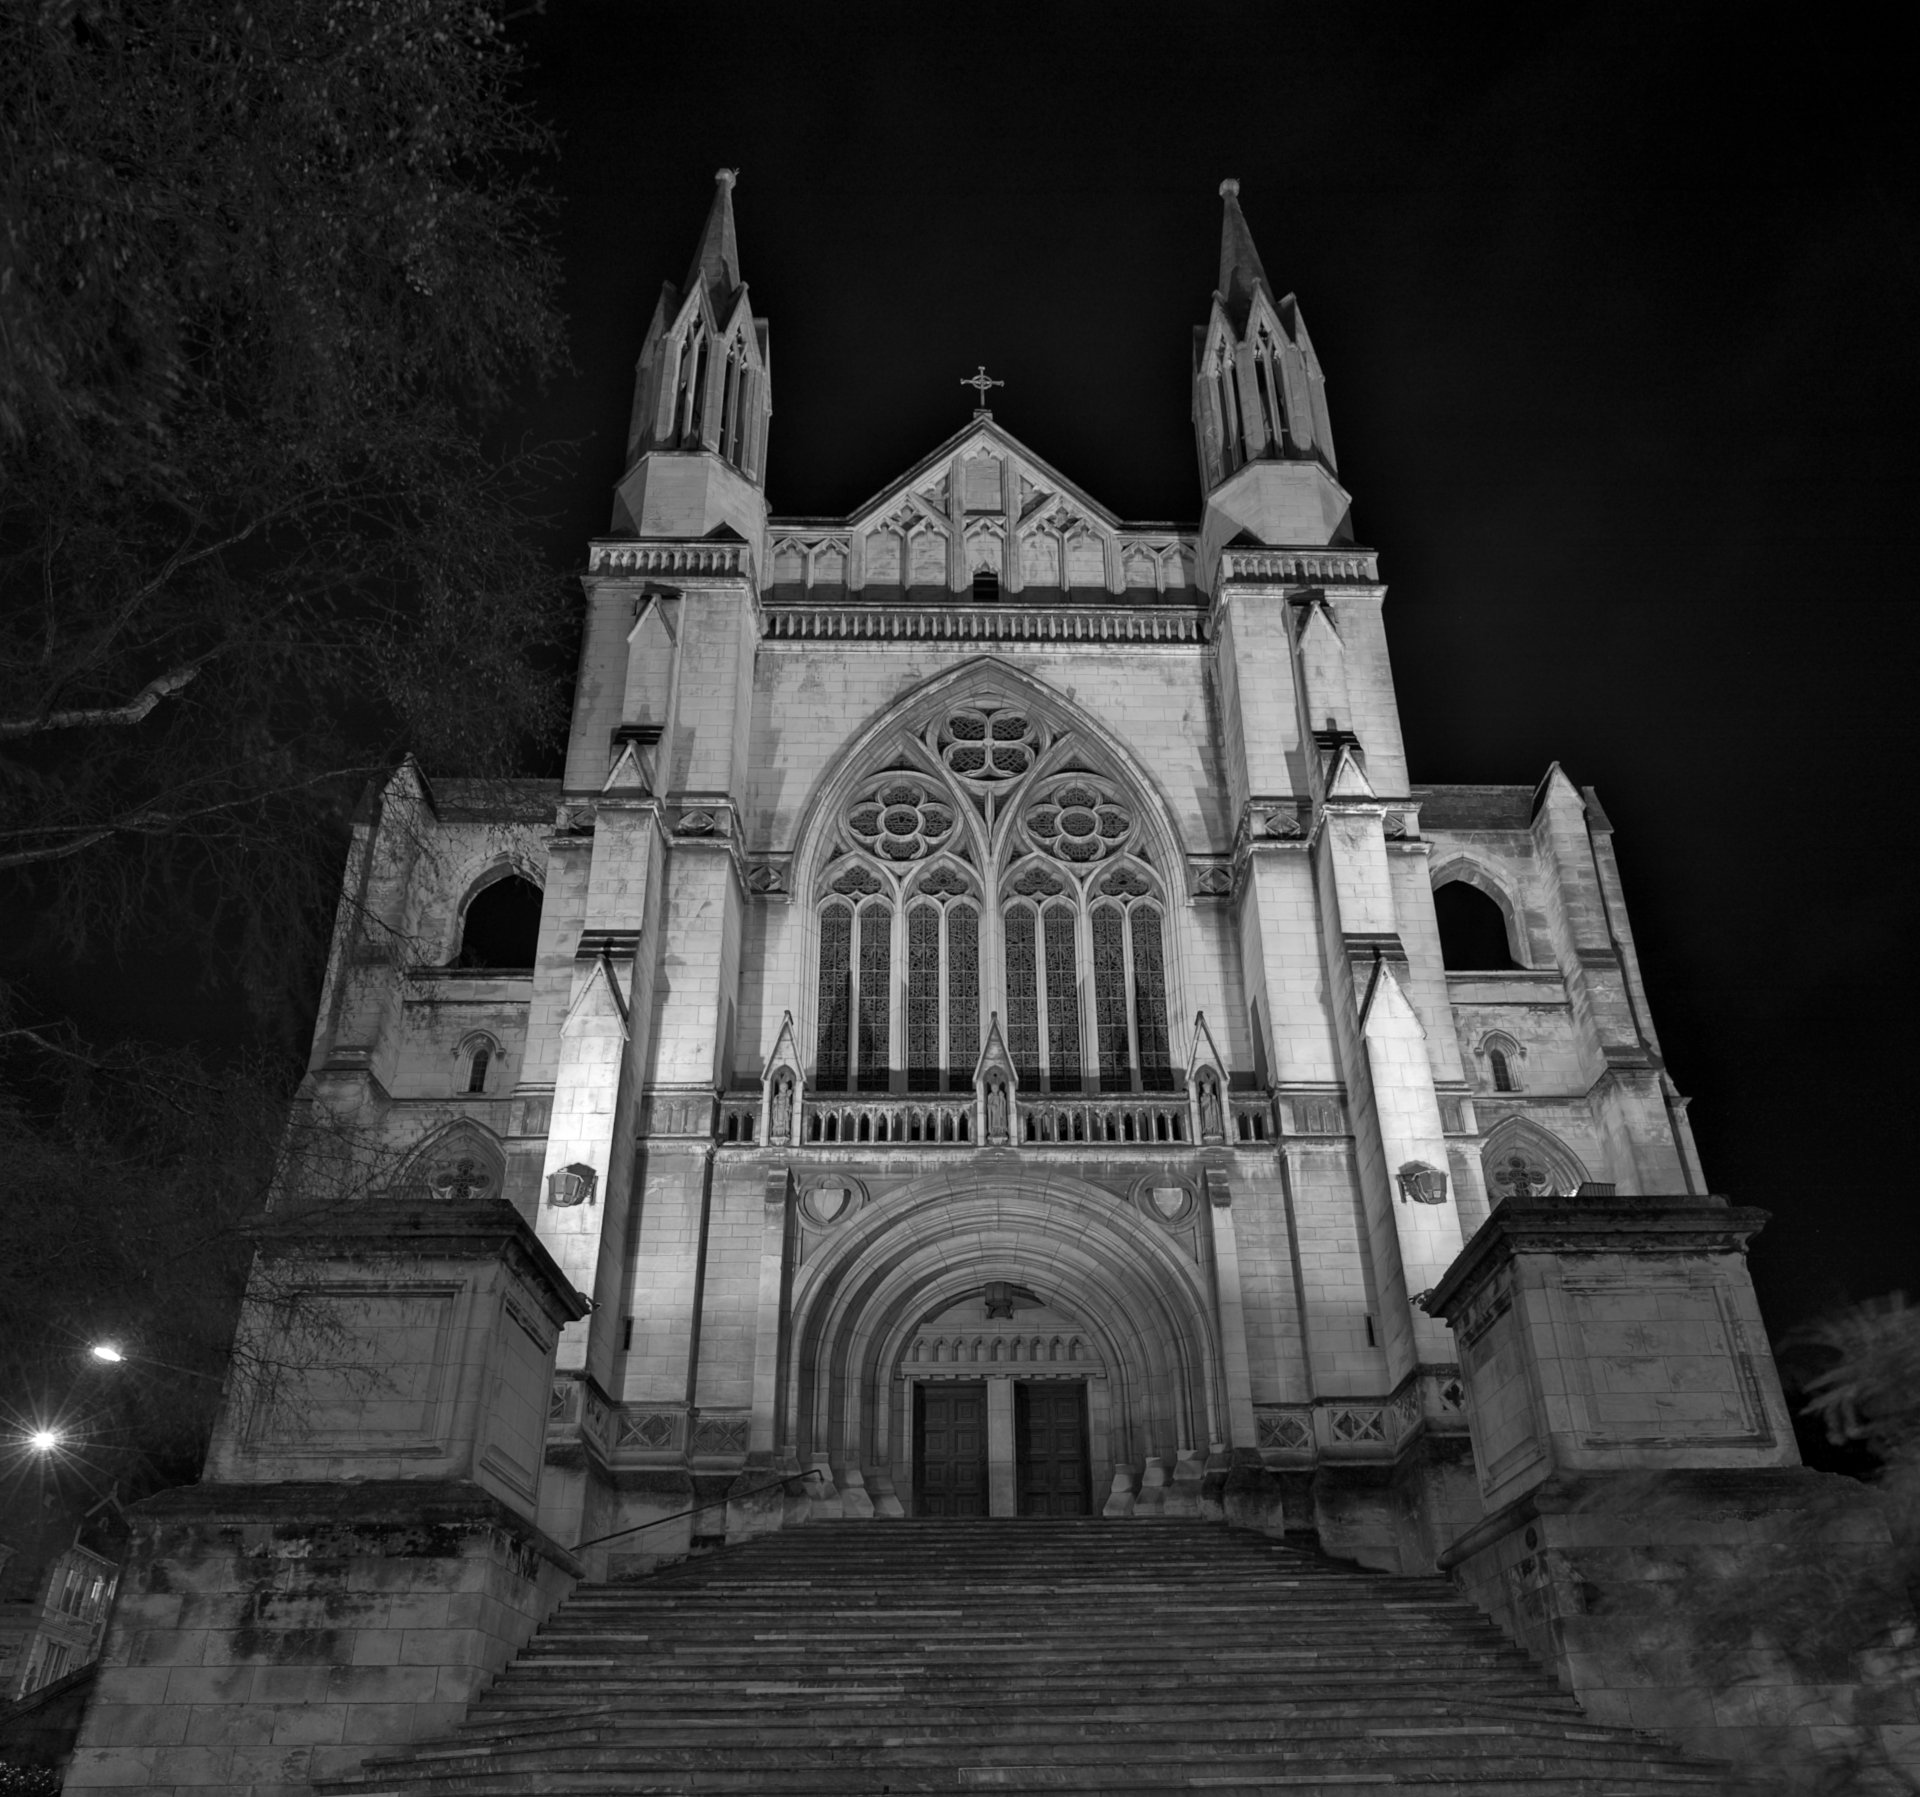
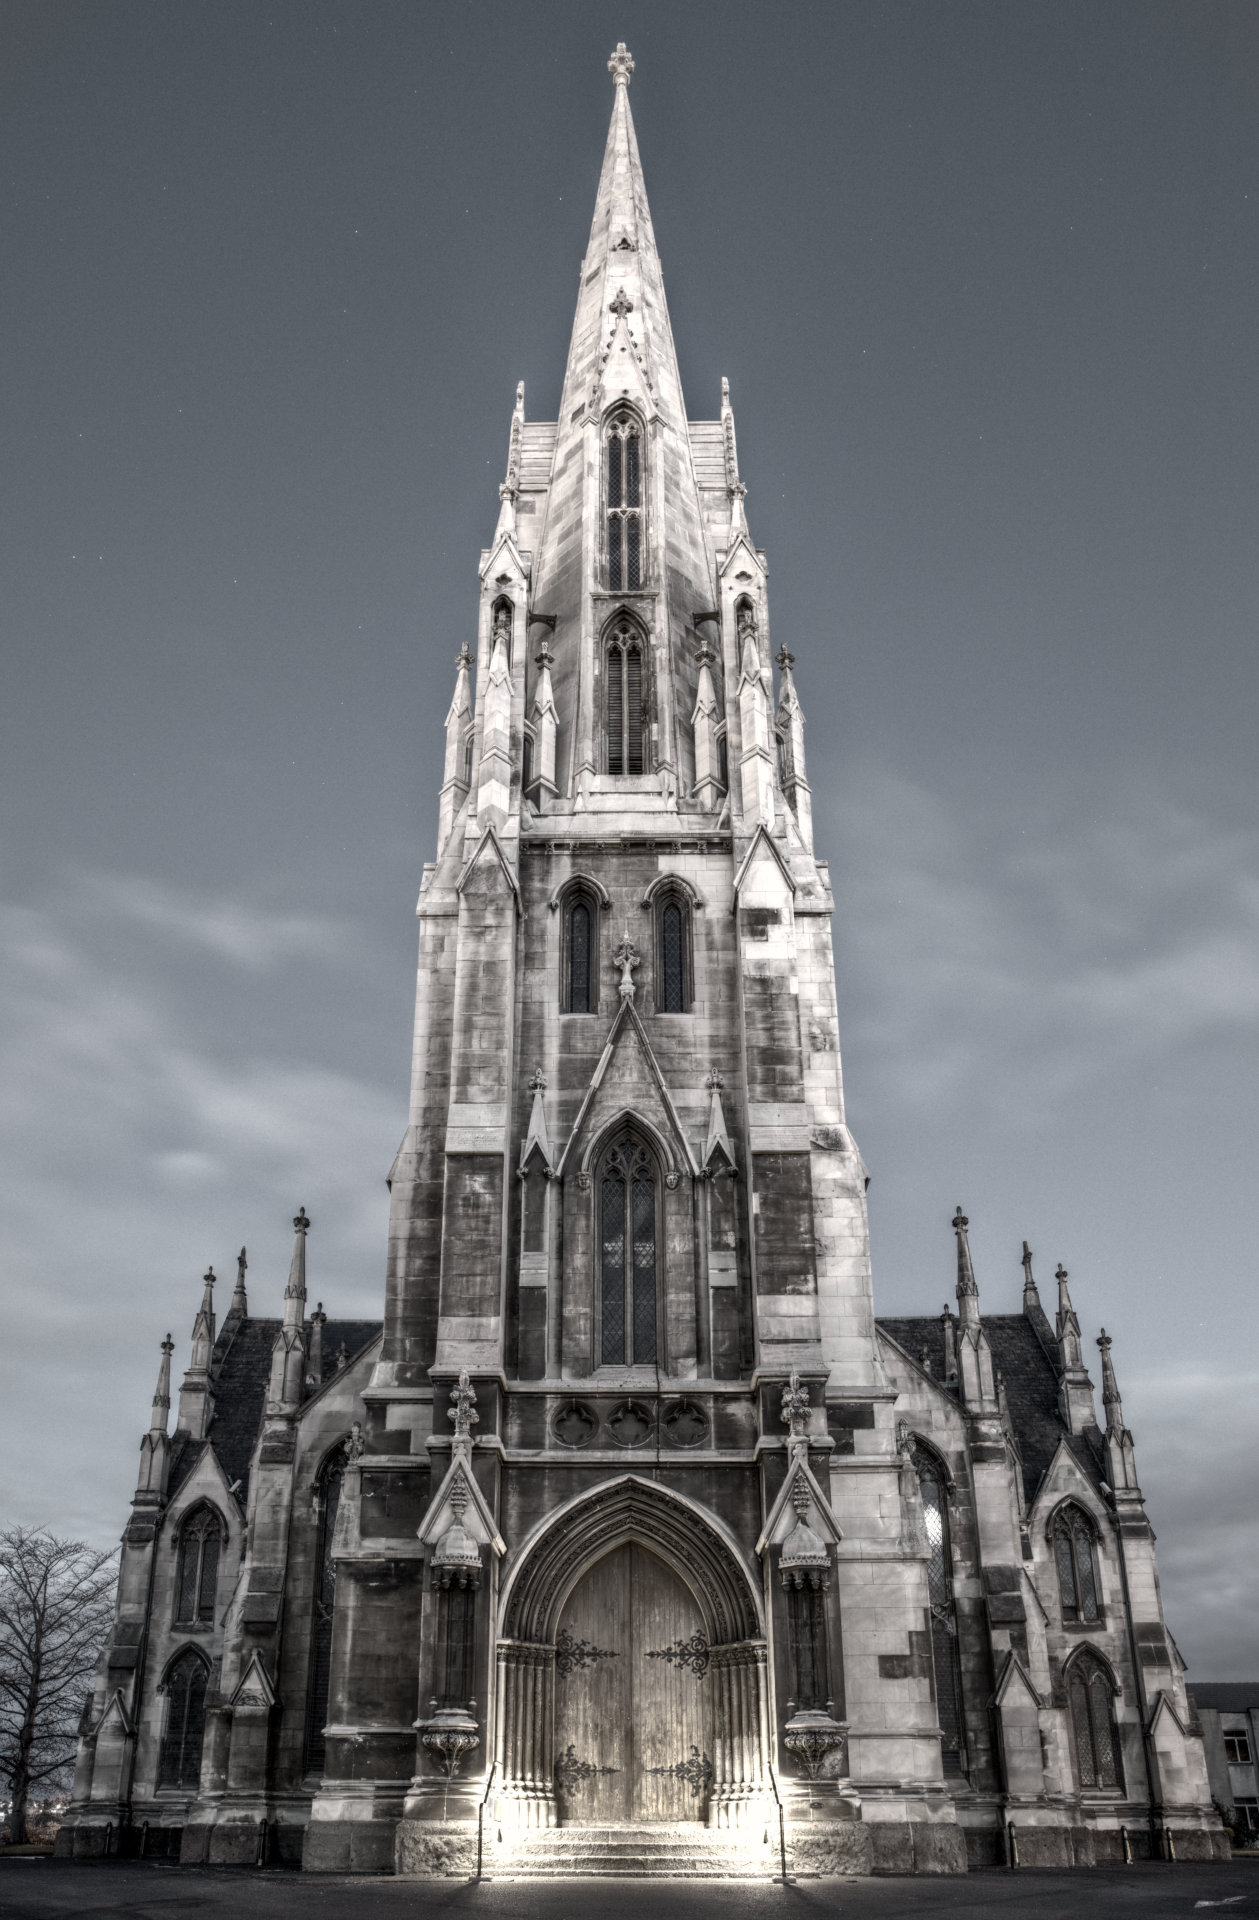
St. Paul’s Cathedral
St. Paul’s is an imposing structure, if not a tad creepy.
St. Paul’s Anglican Cathedral – 2 shot vertical panorama
Camera Settings and Edit
2 x shot vertical panorama f5.6 – ISO 100 – 1 second shutter. 24mm wasn’t wide enough to get it all in so I went for a panorama. I stitched it in Hugin – panorama photo stitcher which proved more difficult than I thought it would. I ended up rotating the image horizontally for the stitch, I also had a large overlap on the images which meant having to crop some of the overlap in Gimp to get a clean stitch.
First Church
Just 100 metres to the south of the Octagon, Stands the towering First Church, the city’s primary Presbyterian church. Less imposing, and in my opinion, a way more elegant structure than St Paul’s
First Church – 3 shot HDR
Camera Settings and Edit
I used the in camera HDR feature for this image, I batch processed the raw files in Darktable, Luminance HDR to blend the sequence and Gimp to finish. 24mm – f5.5 – shutter 1 to 2 seconds – ISO 400 to 800. I used a slightly more processed HDR look for this image and played with a split tone look to get a strong Gothic feel.
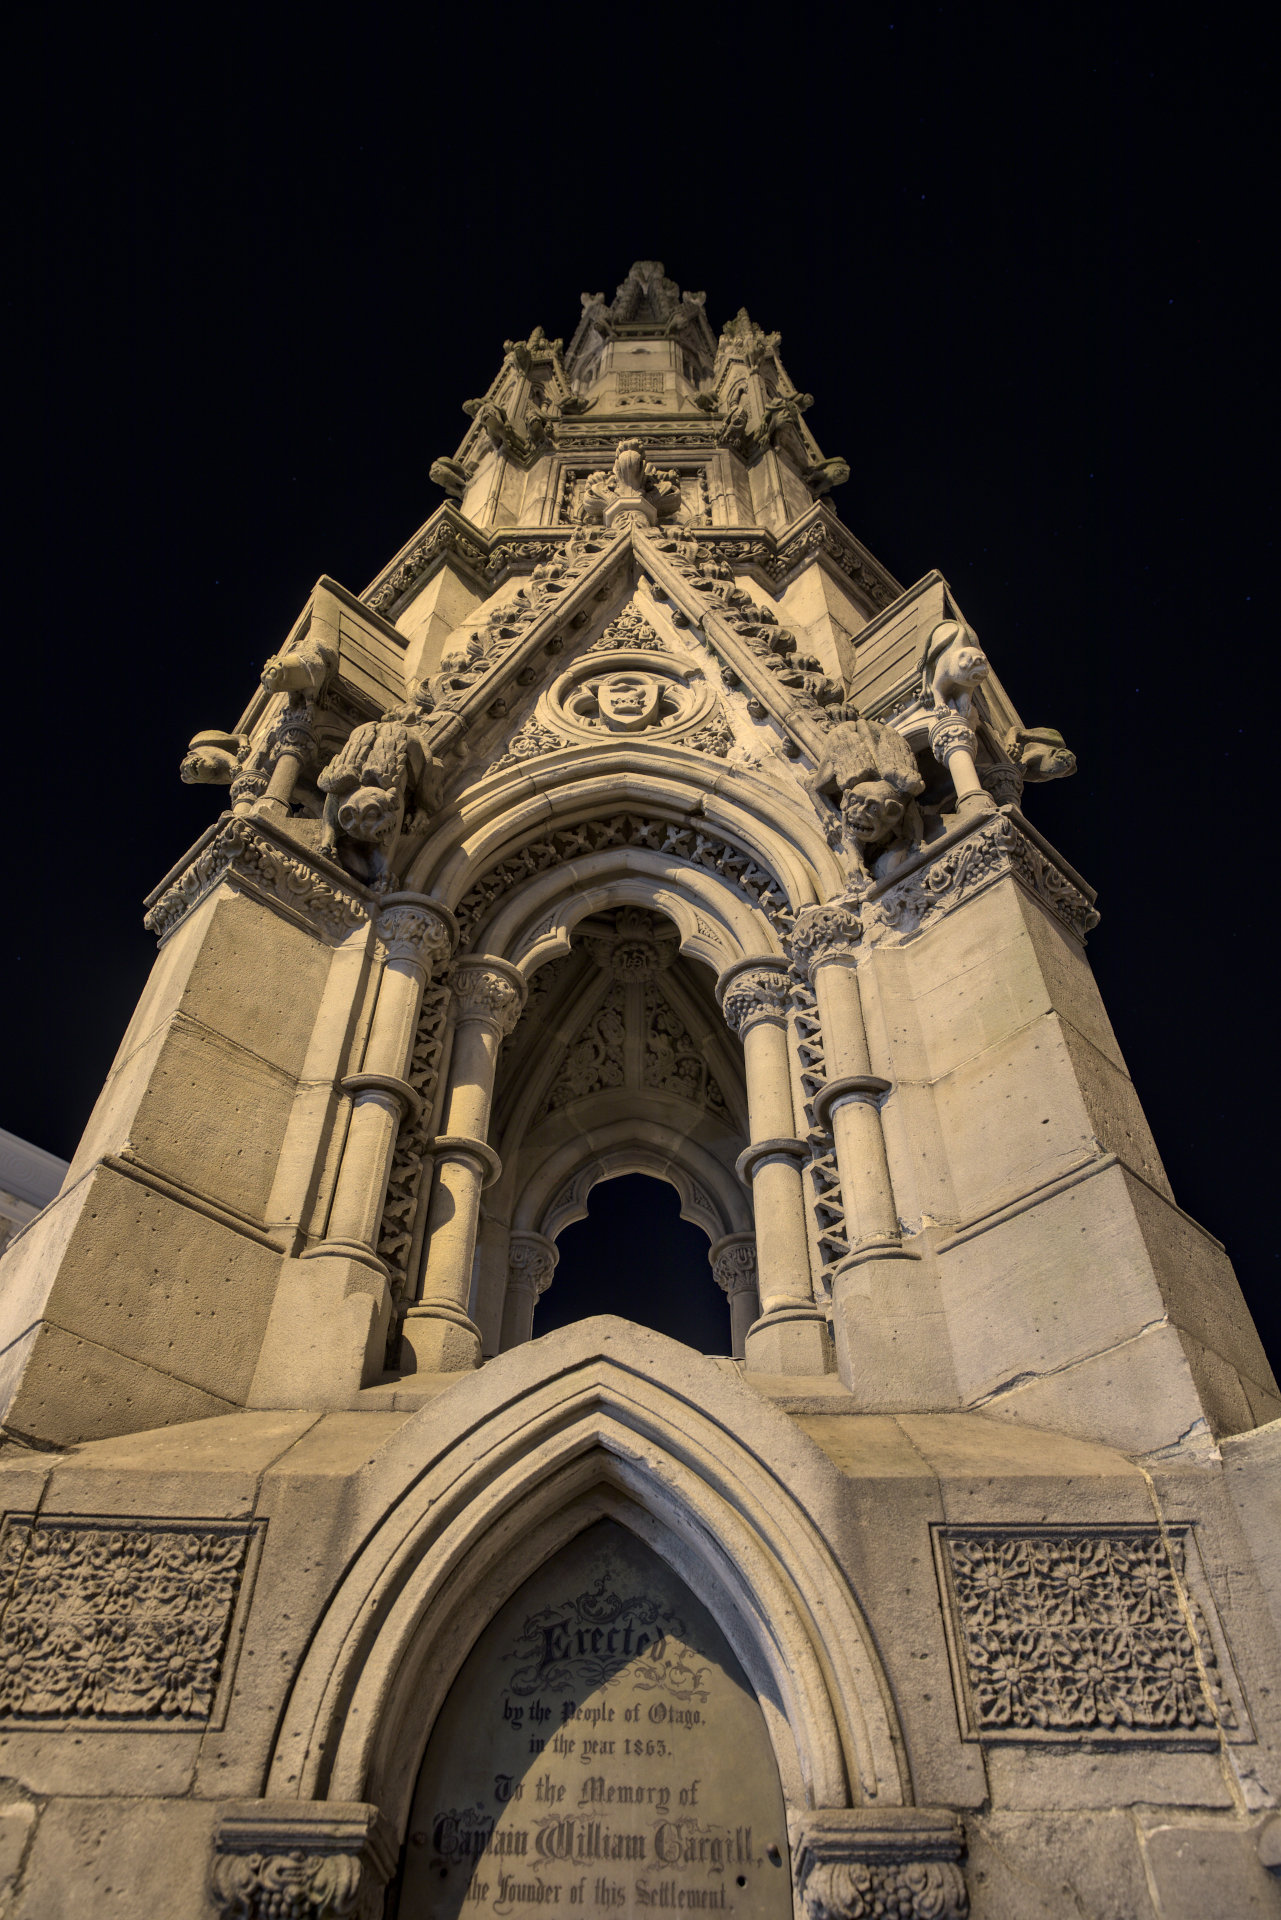
Cargill Monument
The Cargill Monument stands at the corner of Princes Street and Rattray Street on John Wickliffe Plaza. This monument is extraordinary, 16 years after founding Dunedin this drinking fountain was erected and dedicated to Captain William Cargill.
Camera Settings and Edit
I used the in camera HDR feature for this image, I batch processed the raw files in Darktable, Luminance HDR to blend the sequence and Gimp to finish. 24mm – f5 – shutter 1/3 of a second, 2 seconds and 13 seconds – ISO 200
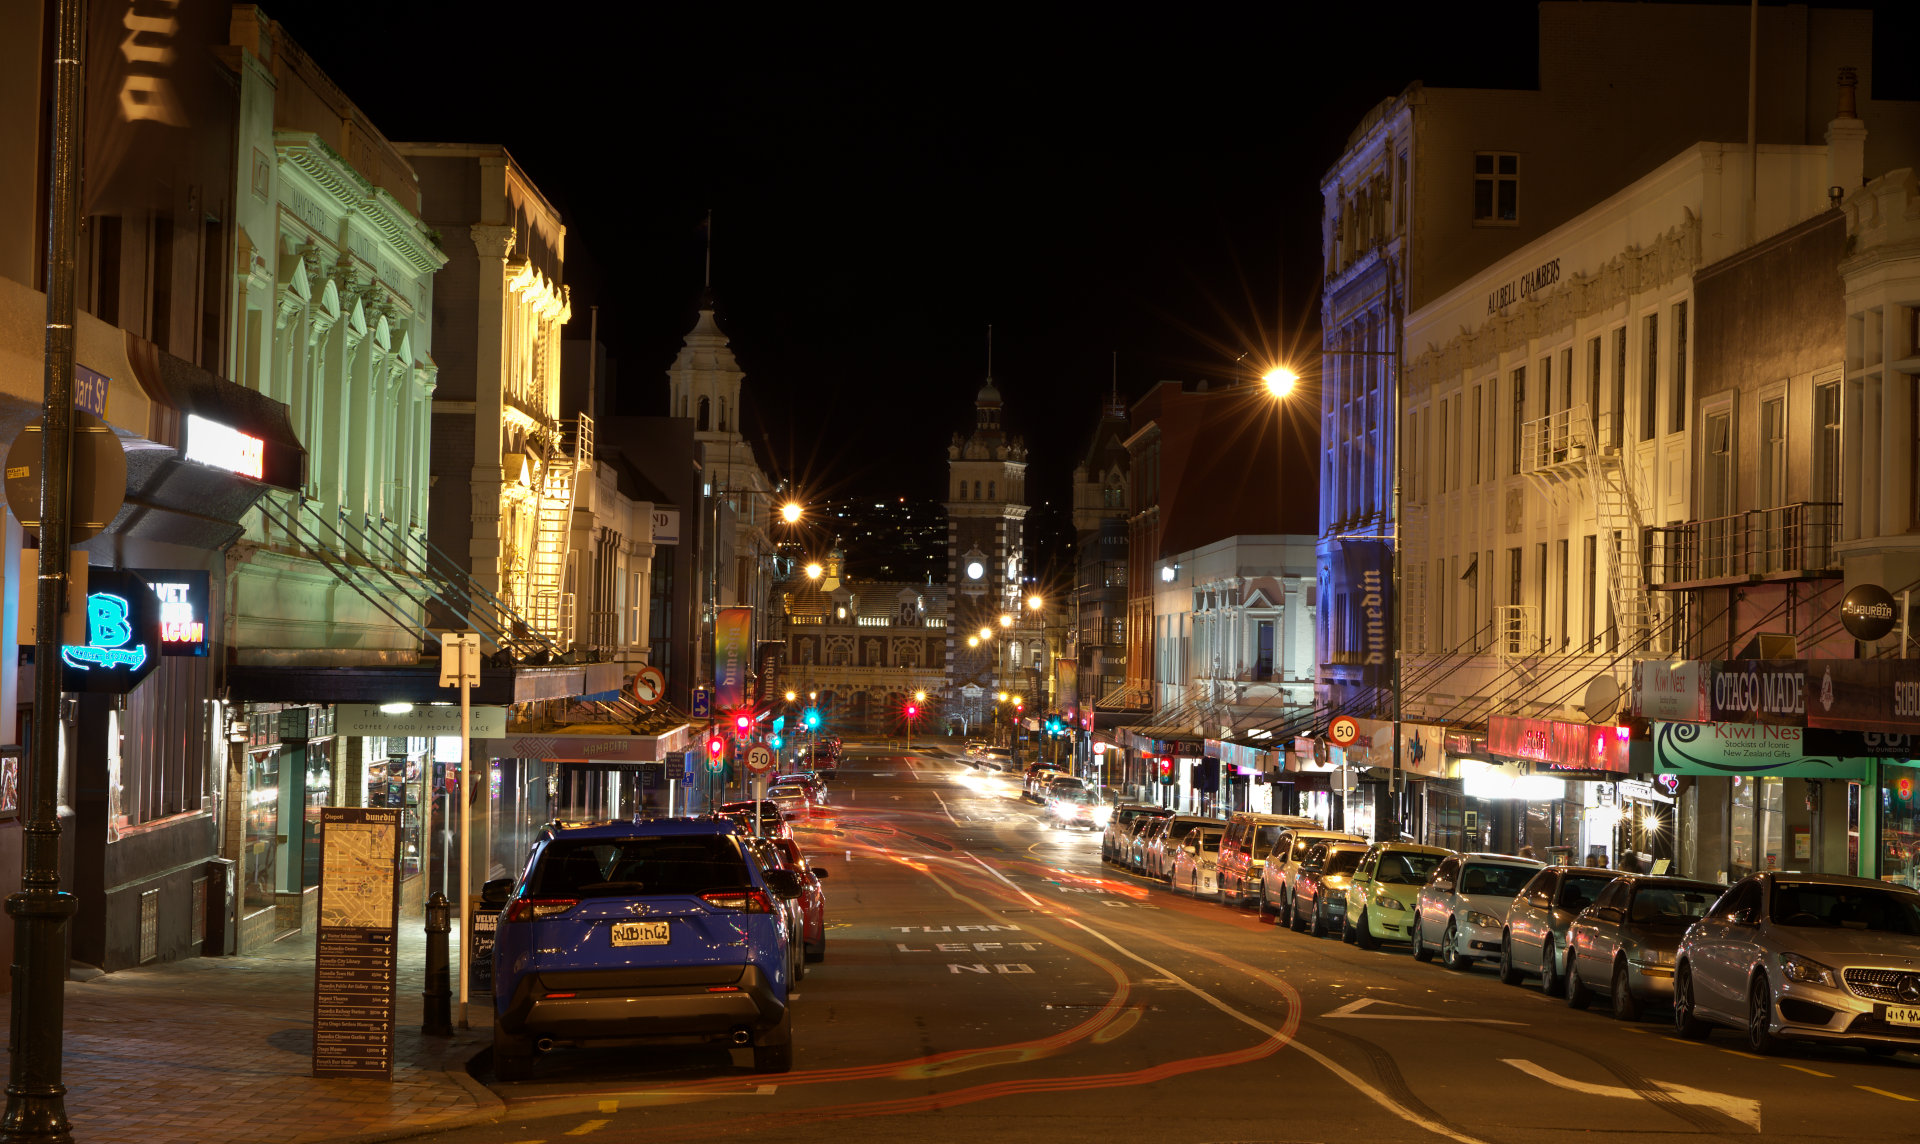
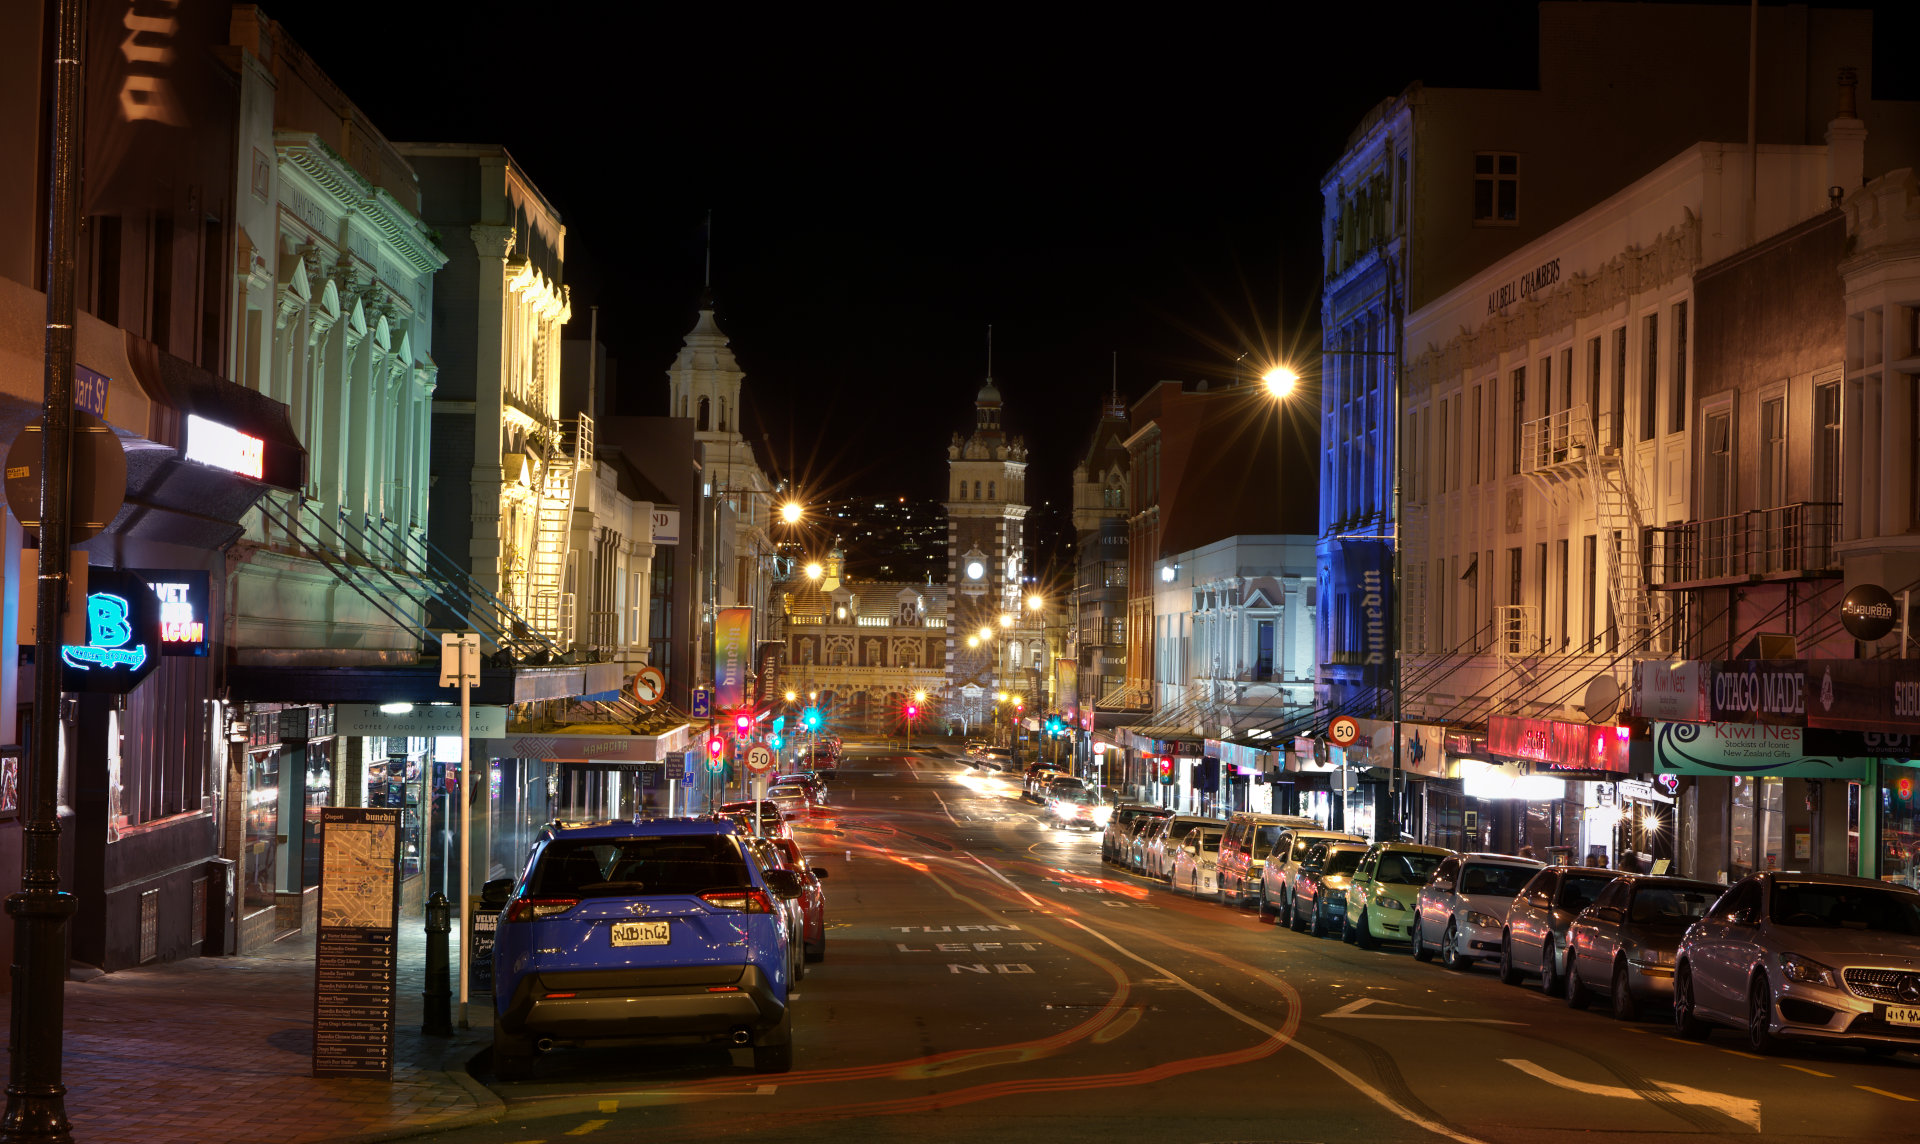
Lower Stuart St and the Railway Station
This next image looks down lower Stuart St from the Octagon to the magnificent Dunedin Railway Station
Looking down lower Stuart Street at the Railway Station – 3 shot HDR
Camera Settings and Edit
In camera HDR, I used the same general work flow, batch edited the RAW images in Darktable , Luminance HDR to blend the sequence and Gimp to finish. 70mm – f13 – ISO 100 – 2.5s 10s and 30 second exposure. I had real trouble highlighting the railway station as it was so small and dark at the end of the street. I ended up using a square shaped gradient in Gimp to lift and direct the eye to the railway station.
I’m definitely Going Back to Dunedin
Night photography in a city is totally different to star scape or milky way photography. I only had an hour or so on this trip but it has given me a small taste of something I would like to investigate further. I have a particular fondness for this area, it has a rich history and beautiful natural surroundings and I can’t wait to go back to explore and photograph Dunedin the Edinburgh of the South.